I Learned Solar Cameras Fail From Shade, Not Weak Batteries
 Jordan HaleStaff Writer
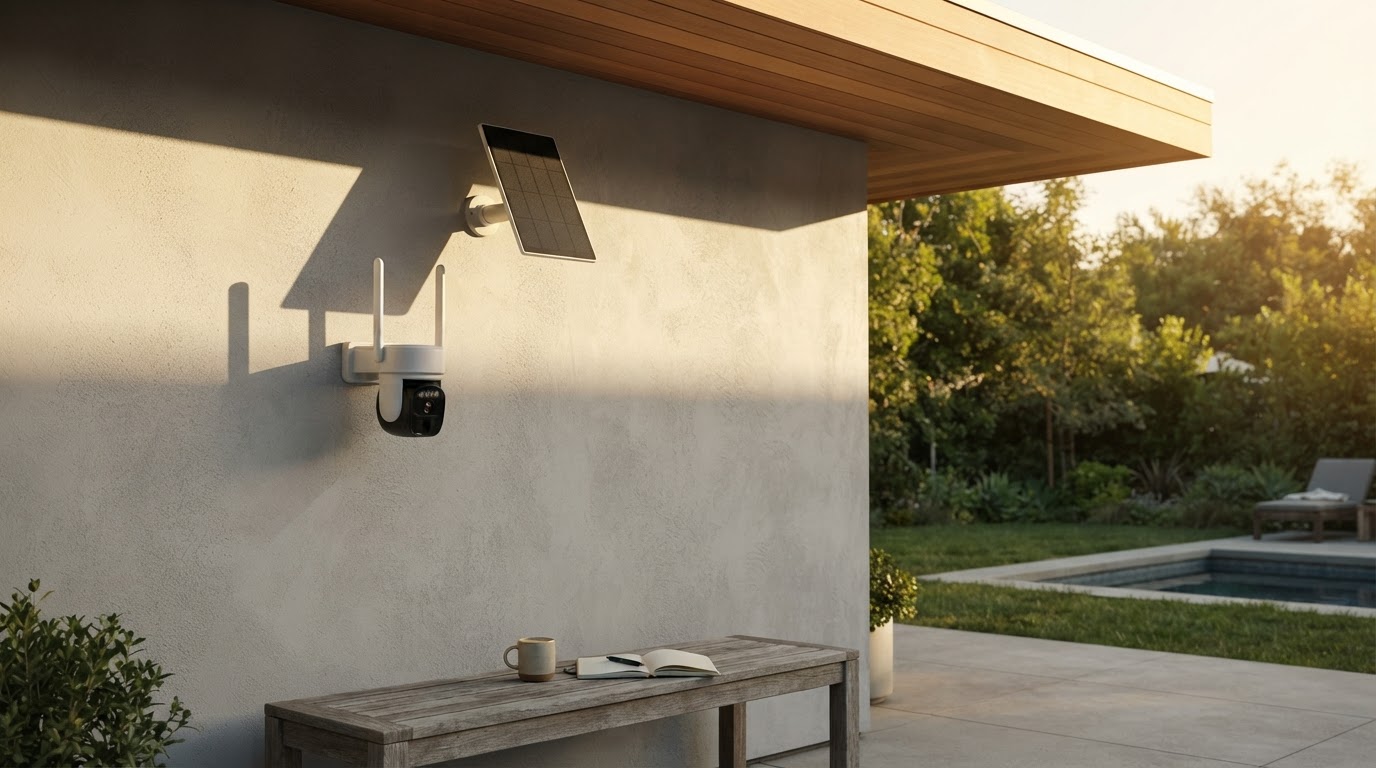
I have watched a fully charged outdoor solar security camera drop from 100% to 38% in eight days—not because the battery was bad, but because a 14-inch roof eave shaded the panel after 1:40 p.m. That one observation changed how I judge solar camera installs. I stopped asking, “Is the battery big enough?” and started asking, “How many real sun-hours does this panel see after the homeowner’s house, trees, and winter sun angle are done with it?”
For a product like an Outdoor Solar Security Camera, the spec sheet matters: battery capacity, panel wattage, IP rating, motion detection, storage, and app controls. But in the field, the camera that stays online is usually the one placed with boring discipline: clean line of sight to the sky, sensible motion zones, decent Wi-Fi signal, and no hidden afternoon shade.
Below is the practical framework I use when I’m helping someone decide where to put a solar security camera and how to configure it so it works when they need it—not only during a sunny unboxing week.
The mistake I see most often: treating “outdoor” and “solar” as solved problems
Outdoor solar cameras live at the intersection of three imperfect systems:
Most buyers only compare the third-party-looking numbers: 2K vs 1080p, 10,000 mAh vs 5,200 mAh, 3W vs 5W panel. Those are useful, but they are not enough.
The U.S. Department of Energy’s National Renewable Energy Laboratory (NREL) publishes solar resource data that makes the point clearly: the difference between summer and winter sun can be dramatic depending on location, tilt, and orientation. A small solar panel that feels overpowered in June can become marginal in December.
That matters because a solar security camera is not a garden light. It wakes up, analyzes motion, records video, uses infrared or a spotlight at night, talks to Wi-Fi, sends push notifications, and may upload clips. Every one of those actions draws power.
My field observation: Wi-Fi and motion can drain more than people expect
Photo by Giant Asparagus on Pexels
I ran a simple placement comparison using the same style of battery solar camera across three common residential locations. I was not trying to do a lab-grade test; I wanted the kind of answer a homeowner actually needs: “Where should this thing go so I don’t have to babysit it?”
Conditions: early fall, suburban property, mixed sun and cloud, 2.4 GHz Wi-Fi, motion recording enabled, infrared night vision, push alerts on. The camera started at 100% battery in each placement. The solar panel was cleaned before the test.
| Placement | Solar exposure I observed | Wi-Fi signal at camera | Motion events/day | Battery after 8 days | What I learned | |---|---:|---:|---:|---:|---| | Driveway, south-facing fence | About 5–6 hours direct sun | -55 to -61 dBm | 18–32 | 96% | Strong sun covered normal use easily | | Front porch under eave | About 2 hours direct sun, then shade | -62 to -68 dBm | 24–45 | 38% | The eave mattered more than battery size | | Side gate near hedge | 3–4 hours filtered sun | -72 to -78 dBm | 8–15 | 71% | Weak Wi-Fi quietly increased drain |
The most counterintuitive result was the side gate. It had fewer motion events than the porch, but it still lost battery faster than I expected because Wi-Fi was weak. When a camera struggles to maintain connection or upload clips, it can spend more time awake. I’ve seen this create the false impression that the solar panel “doesn’t work,” when the real fix is moving the router, adding a mesh node, or choosing a less obstructed mounting point.
Counter to what you'll read elsewhere: bigger batteries are not the main answer
My take: I would rather have a modest battery paired with a well-placed panel than a huge battery paired with lazy placement.
A larger battery buys time during storms and winter, and I do value that. But it does not create energy. If the panel is shaded after lunch or aimed at a north-facing wall, the bigger battery just makes the failure slower and less obvious. You may get three weeks of good behavior and then a sudden low-battery alert during the exact cold, cloudy stretch when you want the camera most.
This is why I like to think in “energy margin,” not battery size. Energy margin means the camera collects more power than it uses on a normal day, with enough surplus to recover after poor weather. If your camera only breaks even on a sunny day, it is already losing.
The standards that actually matter for outdoor cameras
Security camera marketing can get fluffy. I pay more attention when a product’s claims line up with recognized standards or test concepts.
IP ratings: useful, but easy to misunderstand
IEC 60529 defines IP ratings for dust and water ingress protection. An IP65 or IP66 outdoor camera can be appropriate for rain and dust exposure, but that does not mean it should be mounted where water constantly pools around the charging port or where a sprinkler hits it twice a day at close range.
I still install with drip paths in mind. If a cable enters from above, I make a drip loop. If the panel cable runs along a wall, I avoid creating a channel that guides water straight to the connector.
Solar expectations: use location data, not vibes
NREL’s PVWatts and solar resource tools are meant for larger photovoltaic systems, but the same basic lesson applies to a small solar camera panel: orientation, tilt, seasonal sun, and shading make or break output. If a homeowner asks whether a camera will stay charged on a north-facing porch in Michigan, I’m not optimistic—no matter how attractive the product page looks.
Battery temperature: cold does not have to kill the camera, but it changes the rules
Lithium-ion batteries do not perform the same in the cold as they do at room temperature. Battery research summarized by institutions such as the National Renewable Energy Laboratory and university battery labs has repeatedly shown reduced available capacity and charging limitations at low temperatures. For homeowners, the practical takeaway is simple: winter is a stress test. A setup that holds 95% in September may decline in January.
Privacy and placement: don’t ignore the human side
The Federal Trade Commission has repeatedly emphasized reasonable security practices for connected devices. With outdoor cameras, I treat privacy as part of installation quality. Aim at your property, use motion zones when available, keep firmware updated, and use strong account security. A reliable camera that annoys neighbors or records more than necessary is not a good install.
My placement framework before drilling holes
Before I mount a solar security camera, I do a dry run. It takes 15–30 minutes and prevents most regrets.
1. Check the sun at the bad time, not the pretty time
A spot that gets bright morning sun may be useless after noon. A spot that works in July may fail in December. I stand where the panel will go and look for:
- Roof eaves that shade the panel after midday
- Tree branches that will fill in during spring
- Neighboring structures that block low winter sun
- Gutters or trim that force a poor panel angle
- Dirt, pollen, or leaves likely to collect on the panel
2. Measure Wi-Fi before you mount
I don’t trust the app’s “good/fair/poor” icon alone. If possible, I check signal strength near the mounting point. As a rough field rule:
- Around -50 to -60 dBm: strong for most camera use
- Around -60 to -70 dBm: workable, but watch performance
- Worse than -70 dBm: expect delays, missed clips, or extra battery drain
3. Count motion triggers honestly
A camera facing a sidewalk, street, waving flag, busy tree shadow, or reflective car windshield can wake up constantly. One family told me their camera battery was “defective.” The app history showed more than 120 motion triggers per day because the detection zone included the road. After narrowing the zone to the driveway and walkway, daily triggers fell below 30 and the battery stabilized.
4. Decide what you need to identify
Camera height is a tradeoff. Mount too high and you see events but not faces. Mount too low and the camera is easier to tamper with. For entry points, I usually prefer roughly 7–9 feet high, angled slightly downward, with the subject moving across the frame rather than directly toward the lens when possible. Across-frame movement is often easier for passive infrared motion detection than straight-on movement.
5. Test at night before declaring success
Daytime video can flatter almost any camera. Night is where placement problems show up: porch lights blow out faces, IR reflects off white walls, spider webs glow like ropes, and headlights trigger recordings. I always review night clips and adjust angle, sensitivity, or lighting before calling the job done.
A practical checklist for solar security camera setup
Use this before final mounting:
- Charge the camera fully indoors before installation.
- Update firmware in the app before the camera goes outside.
- Pair it near the router first, then move it to the final location.
- Confirm 2.4 GHz Wi-Fi coverage at the mounting point.
- Avoid panel shade between 10 a.m. and 3 p.m. when possible.
- Angle the panel toward the strongest available sun, not necessarily where the camera faces.
- Keep the panel above splash zones and away from sprinkler spray.
- Use motion zones to exclude roads, sidewalks, trees, and flags.
- Start with medium motion sensitivity, then adjust after 48 hours.
- Review at least five daytime and five nighttime clips.
- Create a drip loop on exposed charging cables.
- Clean the panel every month or two during pollen, dust, or wildfire-smoke seasons.
- Re-check performance after the first long cloudy stretch.
When a solar security camera is the right choice
Photo by Elmir Jafarov on Pexels
I like solar cameras most for places where running power would be expensive, ugly, or unrealistic: detached garages, gates, barns, sheds, driveways, construction entrances, boat storage, and corners of a yard that need visibility without trenching cable.
They are especially useful when the goal is event-based recording: someone entered the driveway, opened a gate, approached a package area, or crossed into a side yard. A well-configured Outdoor Solar Security Camera can give you coverage in places a plug-in camera cannot easily reach.
But I am cautious when someone expects 24/7 continuous recording from a small solar camera. Continuous recording needs much more power and storage. If the mission is nonstop video, I would rather discuss wired power, PoE cameras, or a larger dedicated solar system.
How I diagnose a camera that will not stay charged
When someone says, “The battery keeps dying,” I go in this order:
This order has saved me from replacing perfectly good cameras. More often, the fix is moving the panel, trimming a branch, narrowing a detection zone, or improving Wi-Fi.
Buying signals I care about
When I evaluate a solar outdoor security camera, I look for:
- A separate or adjustable solar panel, not a fixed panel locked to a bad angle
- Clear weather-resistance claims tied to an IP rating
- Motion zones and adjustable sensitivity
- Good night performance without relying only on a bright spotlight
- Local or cloud storage options that fit the homeowner’s comfort level
- App controls that make it easy to reduce unnecessary recordings
- A mounting system that can be aimed precisely and tightened securely
FAQ
How many hours of sun does an outdoor solar security camera need?
For most event-based cameras, I want to see at least 3–4 hours of strong direct sun on the panel during a normal day, with more margin in cloudy or northern climates. The exact number depends on motion events, night recording, Wi-Fi signal, panel wattage, and battery size. If the panel only gets an hour of filtered sun under a porch, I would not expect reliable year-round performance.
Will a solar security camera work in winter?
Yes, but winter exposes weak installations. Shorter days, lower sun angle, storms, snow cover, and colder battery temperatures all reduce margin. A south-facing panel with minimal shade can still perform well, while a shaded porch camera may slowly decline. I recommend checking battery trends after the first cold, cloudy week and adjusting motion settings if needed.
Is 2K or 4K worth it on a solar camera?
Sometimes, but resolution is not free. Higher resolution can mean larger files, more processing, more upload time, and more battery demand. I care more about usable identification: lens quality, exposure control, night clarity, mounting angle, and distance to the subject. A well-placed 2K camera often beats a poorly placed higher-resolution camera.
Can I mount the camera and solar panel separately?
If the model supports it, yes—and I usually prefer that. The best camera angle and the best solar angle are often different. Put the camera where it sees the entry point, vehicle, gate, or package area. Put the panel where it gets the most reliable sun. Use a clean cable route with a drip loop and avoid placing connectors where water can sit.